Google Search Console is a free tool by Google that helps website owners understand how their site appears in search results, and it provides insights to enhance site performance on Google.
Learn how this tool improves website visibility and addresses common issues. From adding a new website to verifying domain ownership via DNS, we break down the process with user-friendly screenshots.
How Google Search Console can help us find issues with websites
Google Search Console identifies problems on your website, such as broken links or indexing issues, so you can fix them and ensure your site is easily discoverable by users.
What can we do on Google Search Console:
- Get a performance overview, like total clicks, total impressions, average position.
- Get pages indexing stats (indexed pages and ignored).
- Adding sitemaps for search engine crawlers.
- Discover security issues.
- And many more.
Here are a few screenshots of one of my abandoned websites that I want to improve and make better. Without Google Search Console, it will be impossible to find any issues.
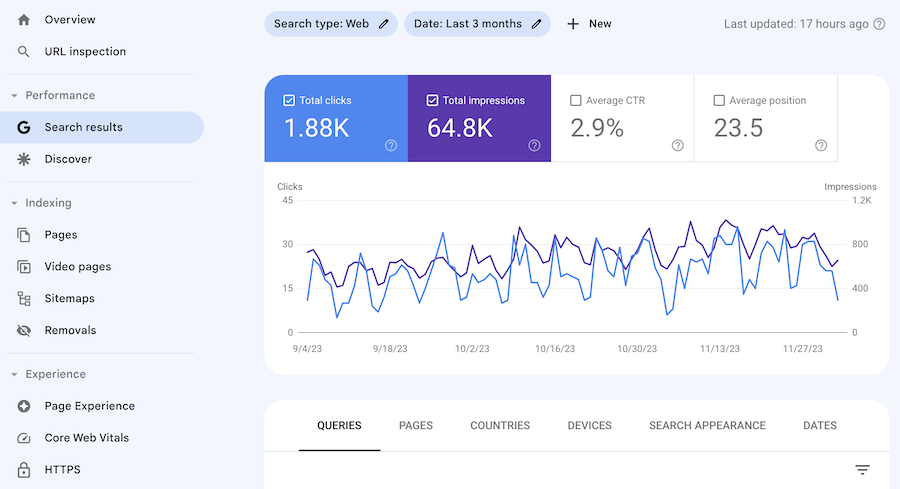
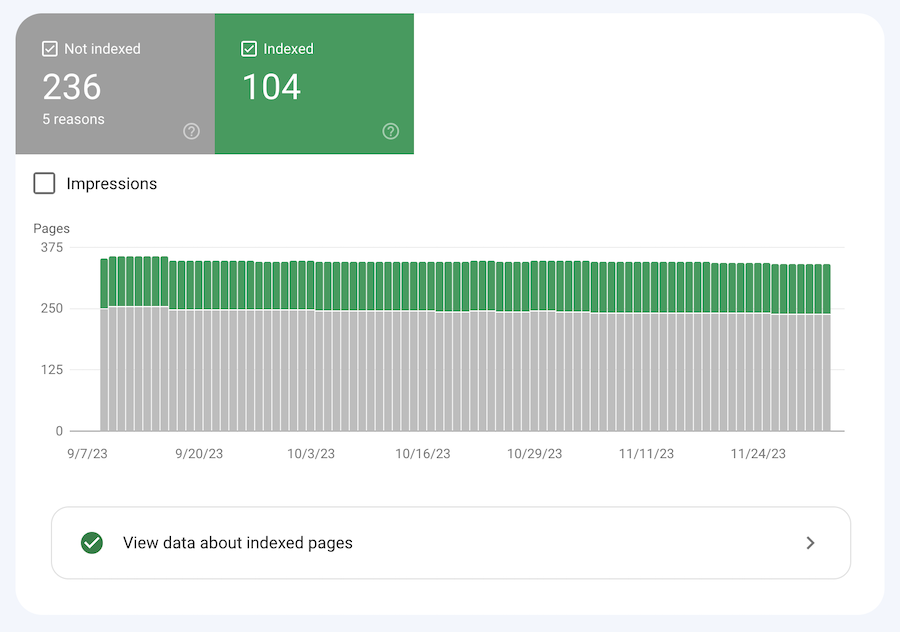
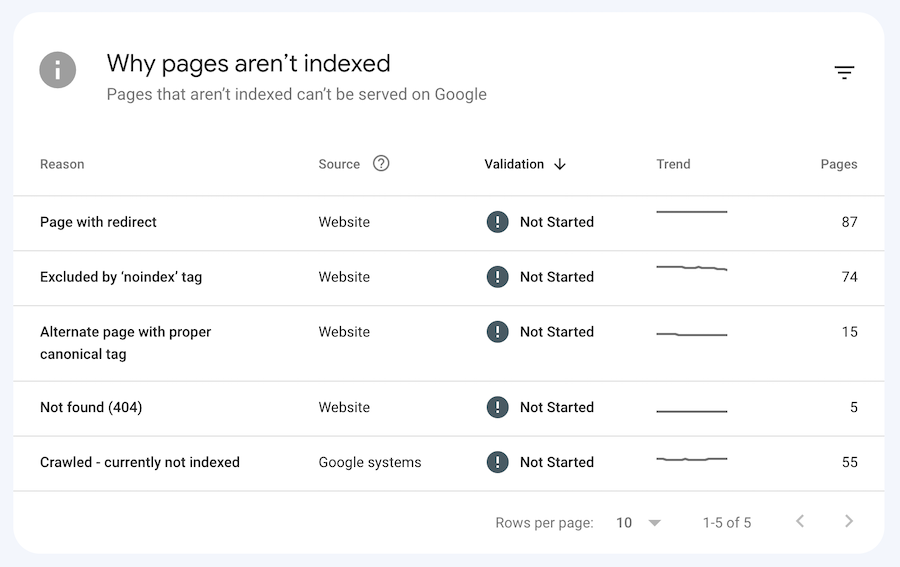
Each project must be added to Google Console, and my new project is not an exception. So, let’s dive into this process and add another newly registered domain to the search console, to have everything in one place and keep an eye on the website search performance.
In the next articles, I’m going to show you how to improve your website and fix common issues with search appearance. Don’t forget to add my blog to your bookmarks.
Adding a new website
To include a new website in Google Search Console, you need to sign in first. Create a Google account and use the following link to get inside: https://search.google.com.
If you don’t have an account there, you will be asked about your domain name and verification method. For 5 years I’ve been using only the domain verification method; it’s the easiest way to verify your website ownership. In this article, I will cover only this case.
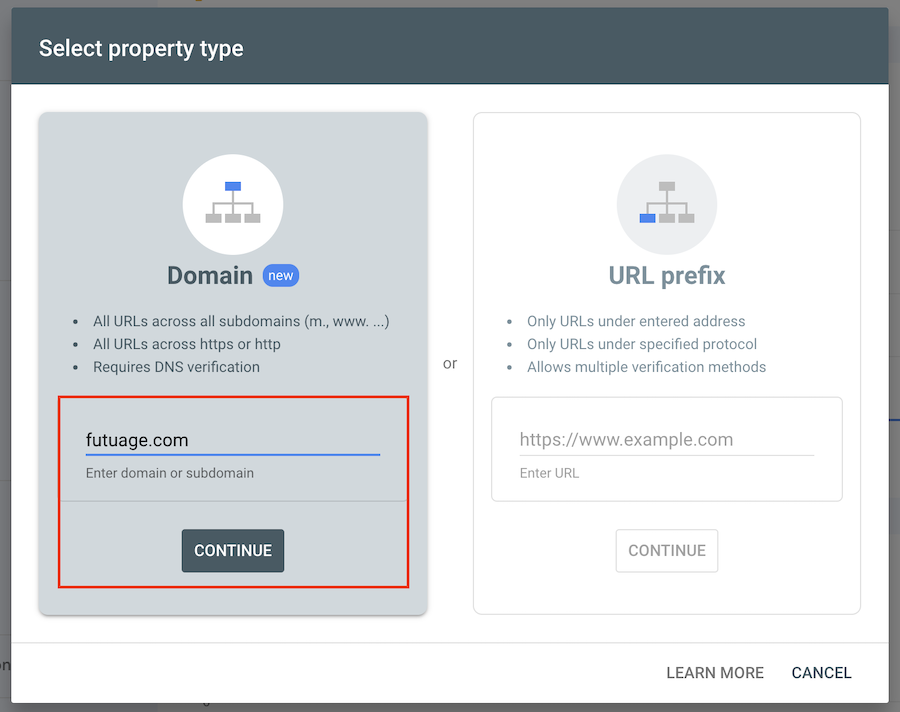
In some cases, you need to open the search box in a left sidebar and add a new property via this interface. Simply click the “Add Property” menu item.
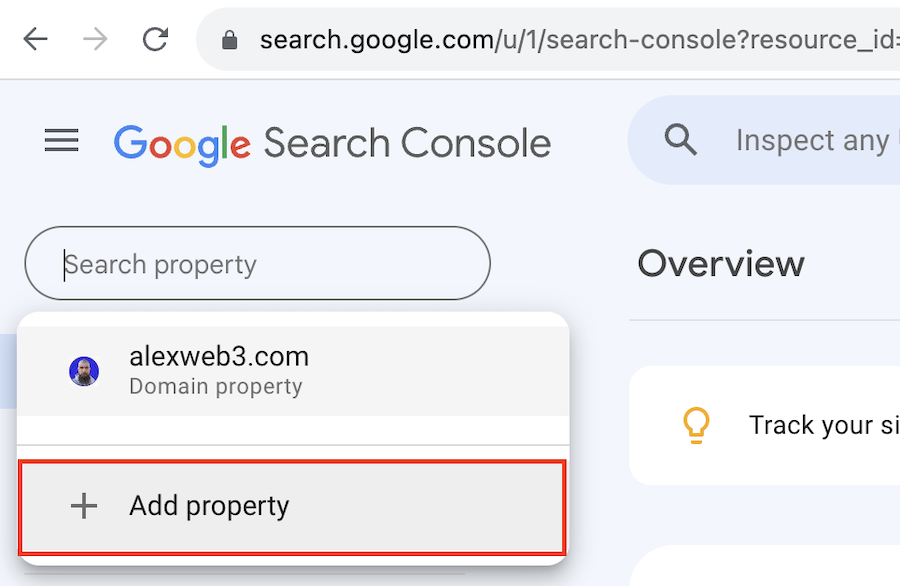
Now we need to follow the simple steps to verify ownership and gain access to valuable site data.
Confirmation domain ownership via DNS
Verifying domain ownership via DNS requires you to add a small piece of code to your domain DNS settings. Why do we need that? To confirm you have control over the site.
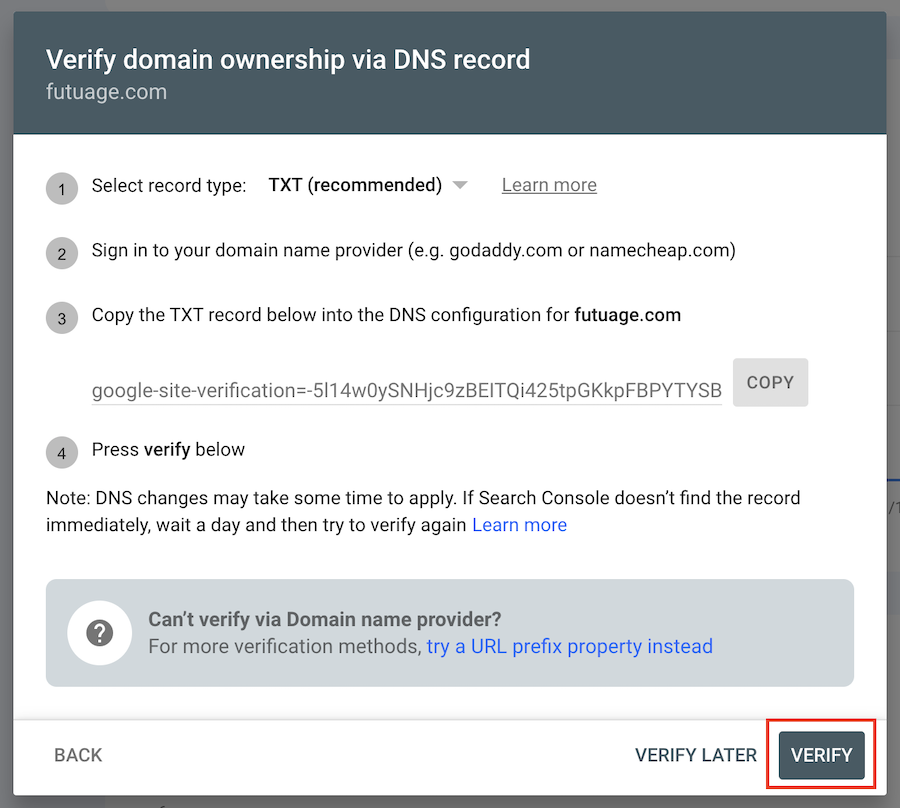
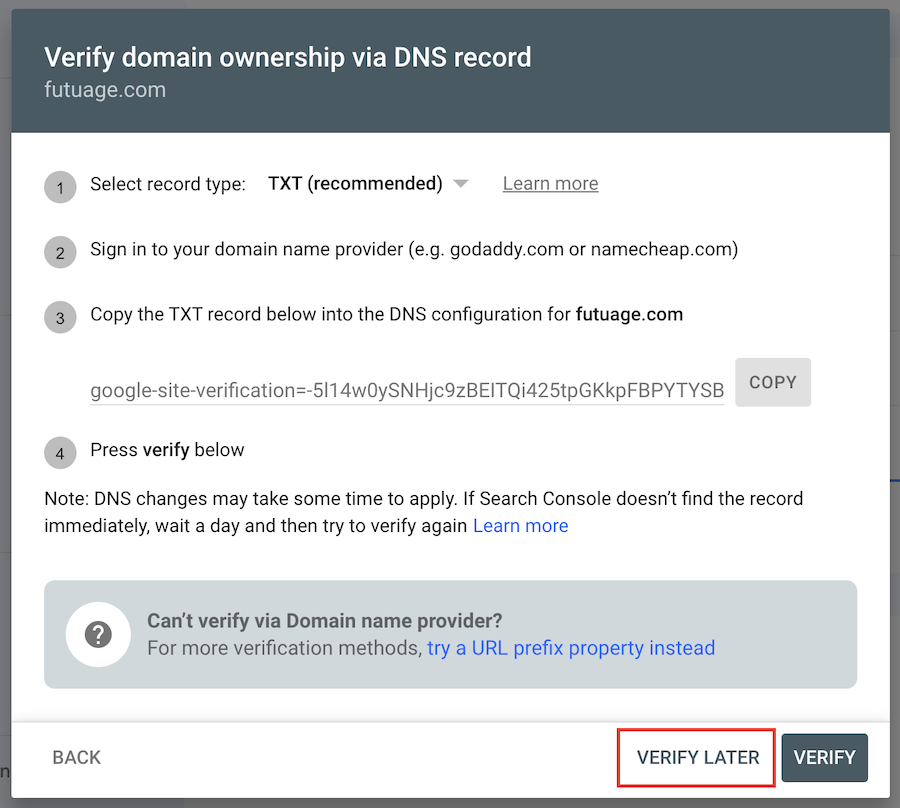
Once you finish the previous step (typing your domain name), you will see the following popup window with all the required steps for verification.
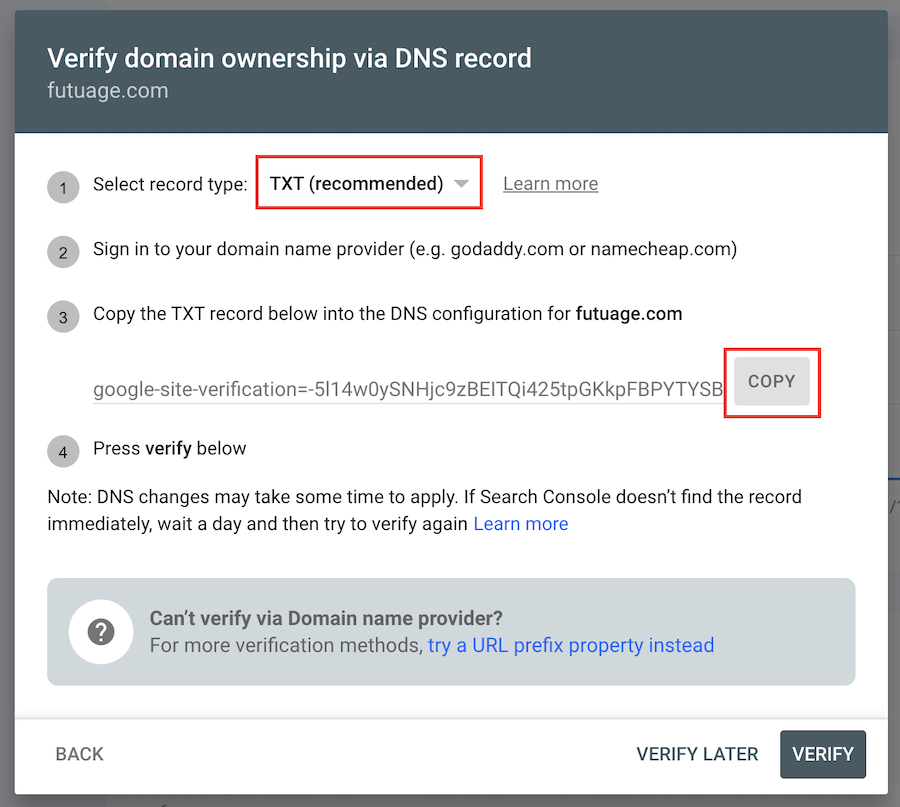
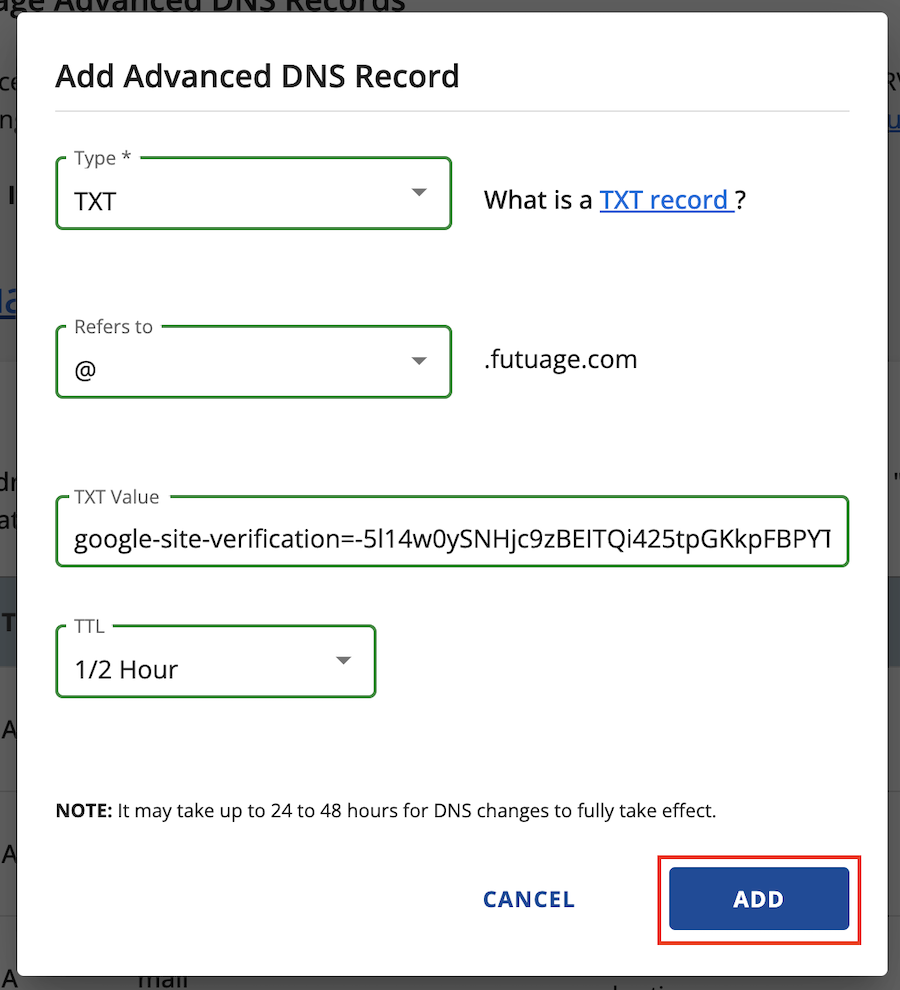
In this window, we need to select the record type “TXT (recommended)” and then copy the TXT record to paste this value into your domain DNS settings.
I am going to show you two registrars: GoDaddy and BlueHost. For other cases everything is almost the same; you just need to open your domain registrar website, sign in using your account and navigate to DNS settings.
Please note, DNS changes may take some time to apply. I was able to verify my domain in 5 minutes, but in some cases, you will wait up to 1-2 days. It depends on DNS settings and the used server which keeps your records.
Finding your domain name servers
In some cases, your domain name records can be managed by another platform, not only by the service where you purchased your domain. It’s called “changing name servers” or “delegation”.
My domain was purchased on GoDaddy, but I’ve delegated DNS to BlueHost for some reason. To make changes in your DNS settings, first of all, you need to find that service which keeps your domain records.
You can open DNS settings in your domain registrar panel (in my case GoDaddy), navigate to your domain name.

Then find the “Nameservers” tab. You will see a few records, which show us who manages our domain name.
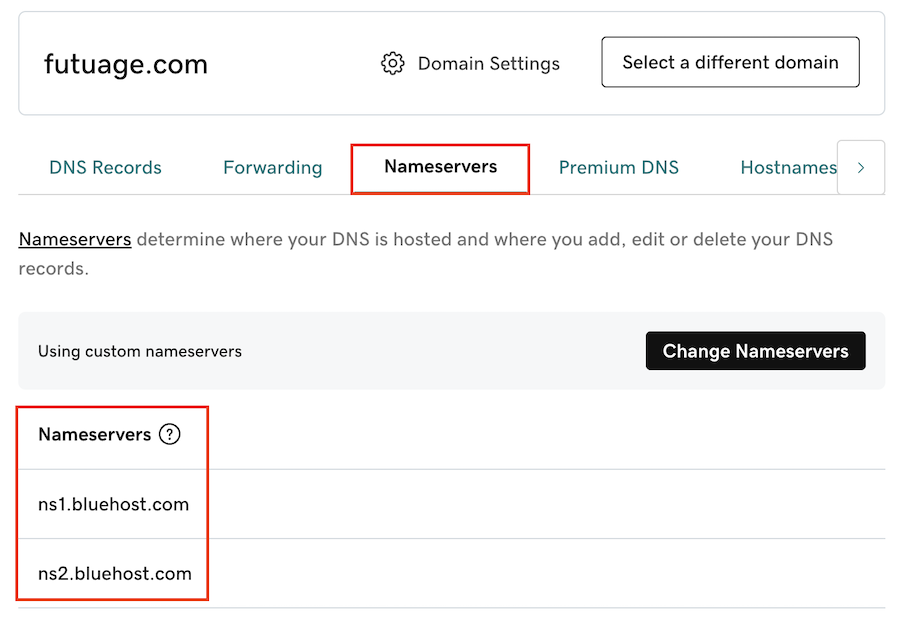
In my case, it’s BlueHost. So, to make any changes to my DNS, I need to sign in to BlueHost after all to update settings.
If you see name servers which have a value of your domain registrar (GoDaddy, for example), you can keep using the same interface.
DNS settings on GoDaddy
When you open your domain on GoDaddy, simply open the first tab “DNS Records”.

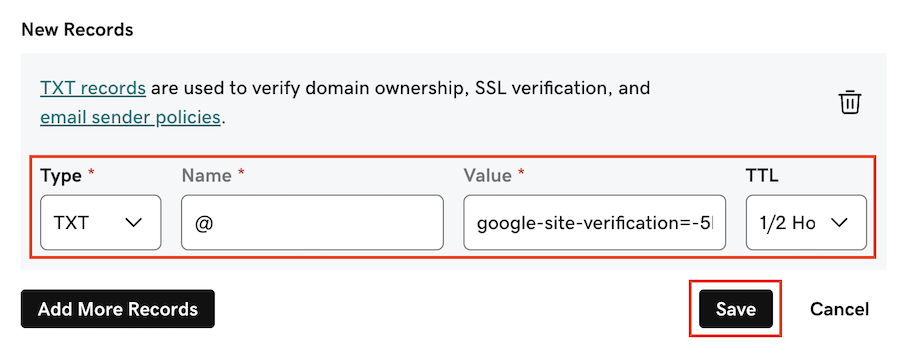
In the next screen, you need to fill out the record form: choose “TXT” type, put “@” in the “Name” field, set the value to given value from Google Search Console and click “Save”.
DNS settings on BlueHost
As my website is hosted on BlueHost, I am going to show you how to make changes using their Hosting solution. In some cases, you need to find another section on BlueHost; I don’t have access to it at the time of writing this article.
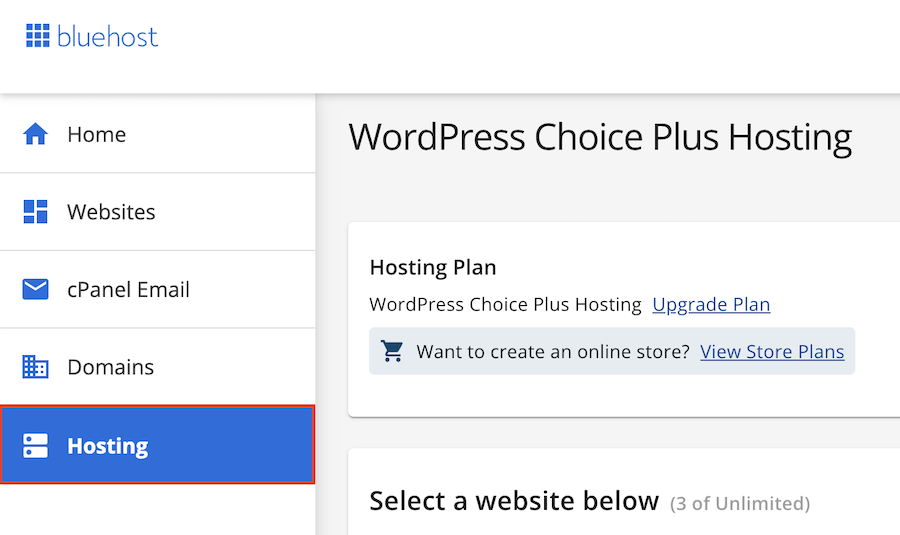
Sign in to BlueHost and open the “Hosting” section from the left menu.
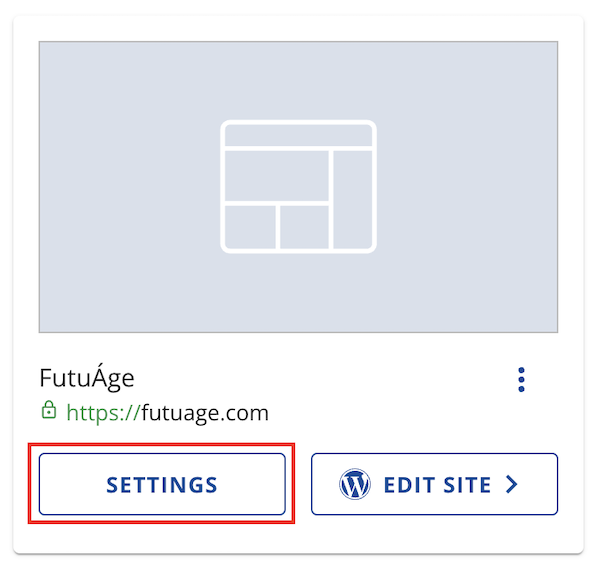
Find your domain name and click on the “Settings” button.
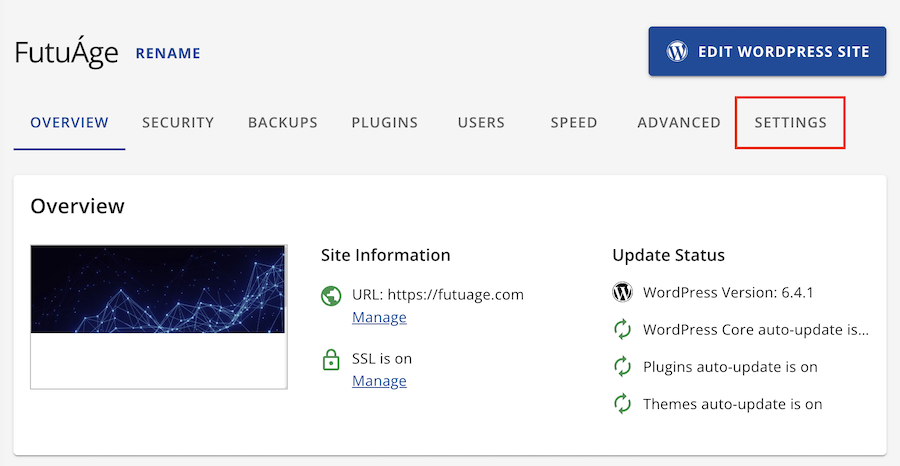
Open the settings tab in the next window.
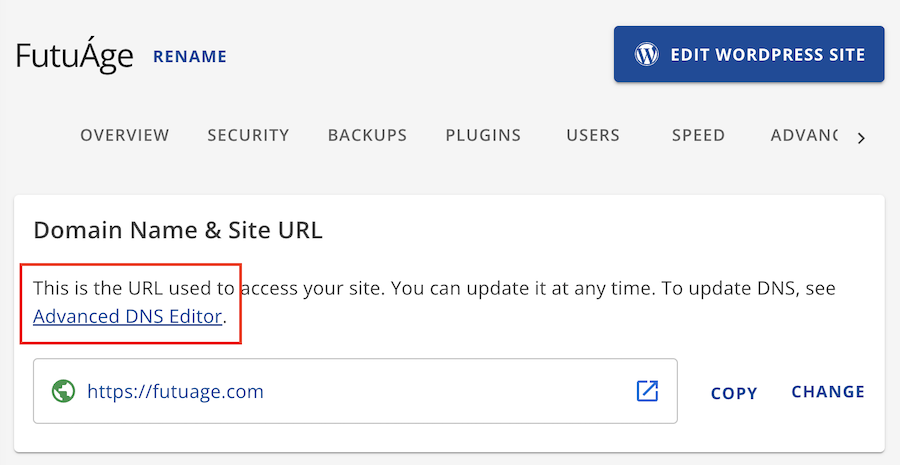
Open “Advanced DNS Editor”.
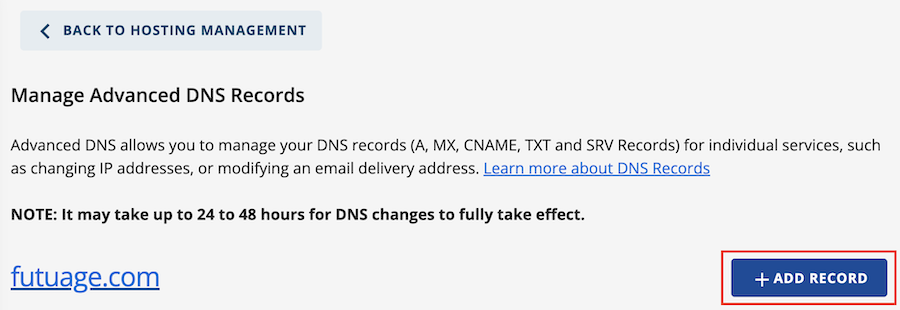
Open an interface to add a new DNS record.
Fill out the new DNS record form.
If everything goes well, you will see a confirmation message.

You can scroll down this window to “TXT” records section. Click on “Show more” to expand this table.
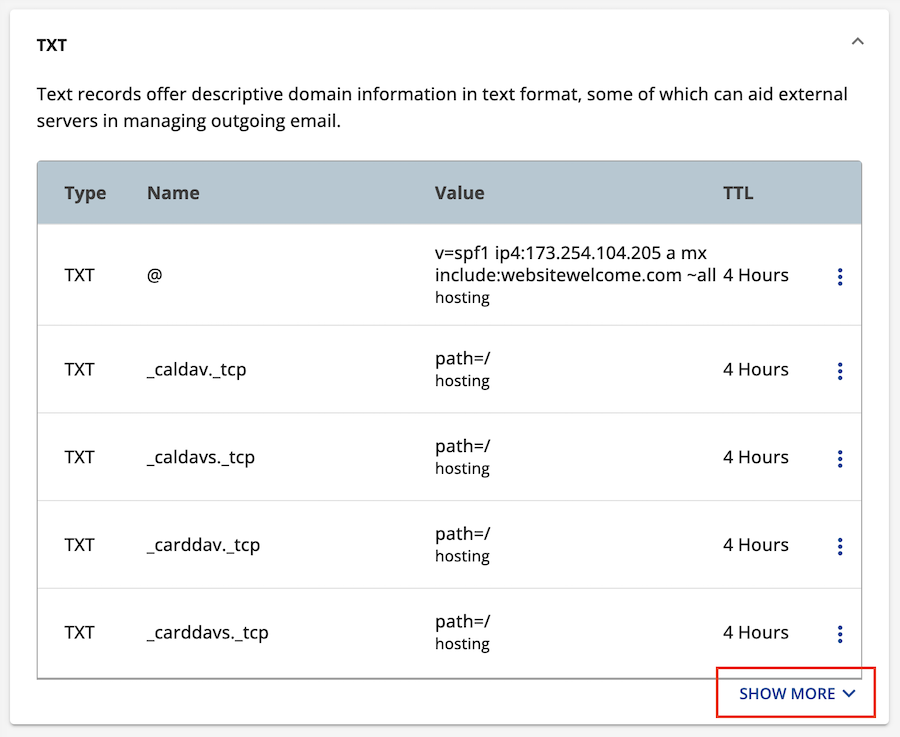
And you will see your newly added record.

If there is no record yet, just wait.
Ownership confirmation on Google Console
Now it’s time to check access from Google to our website. Jump into Google Console and start the verification process by clicking the “Verify” button.
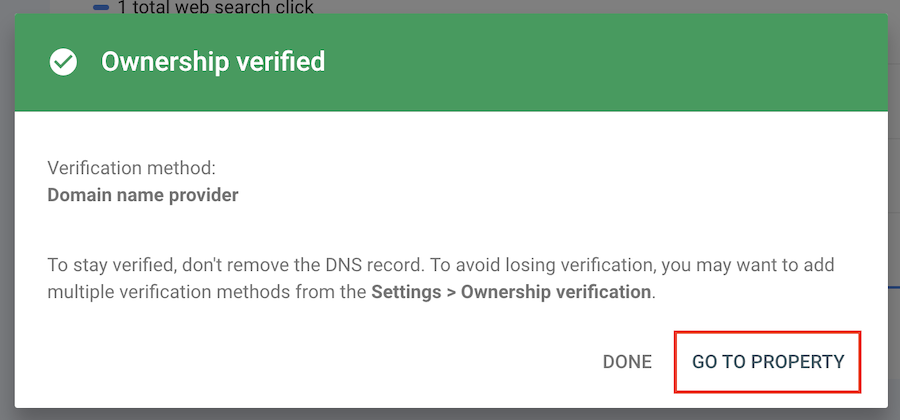
If you see a green window, it means that everything is great, and you have successfully verified your website ownership.
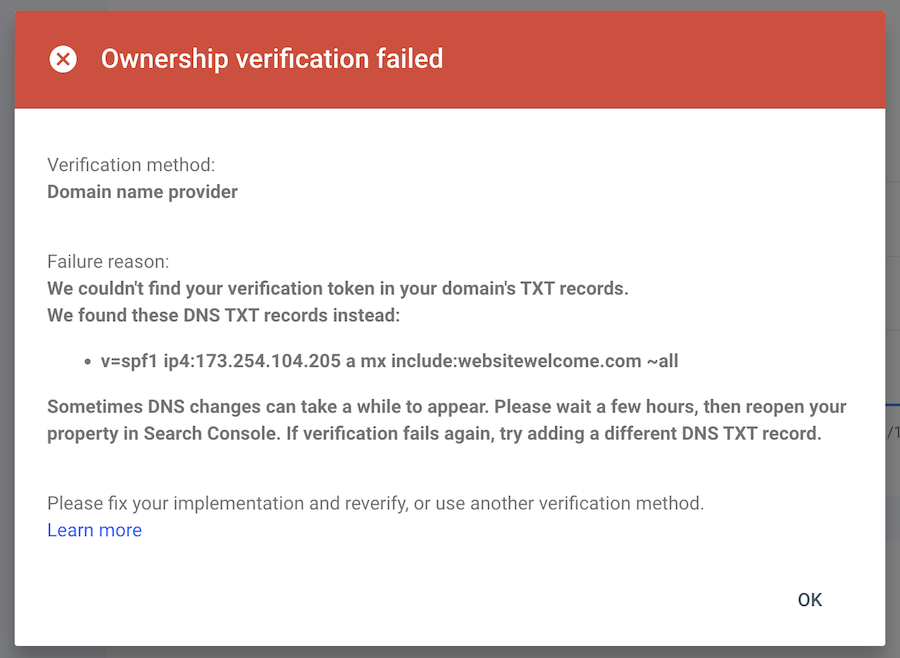
In other cases, when your DNS is too slow, you can see another window, which tells us that Google doesn’t confirm your ownership.
If you don’t want to wait right now, you can click “Verify later” and try again in 30 minutes or later.
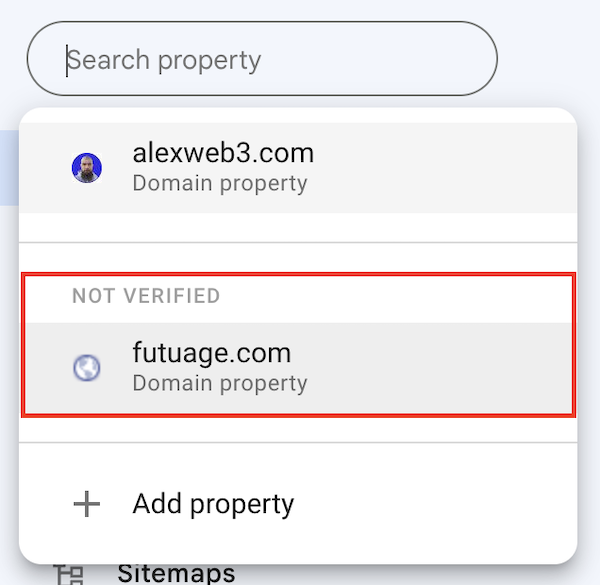
If you closed this window, you can easily continue the verification process by choosing your domain property from the search box on Google Console.
Conclusion
Google Search Console is a valuable tool for website owners, offering insights and solutions to improve search visibility and ensure a smooth online experience for users. However, domain verification may take some time; be patient and you will have access to your website stats and metrics!
In the next article, I’m going to show you how to send your website sitemap to Google Search Console to find indexing issues.
I hope you guys enjoyed this reading. If so, please share this article with your friends and colleagues. It will help me a lot and motivate me to write more content for you.


I love this kind of step-by-step with zero BS tutorial with reasons why people should do it. Concise and compact. Well done Alex!
Thank you! <3